Showing posts with label Tutorial. Show all posts

Tuesday, October 19, 2010

Understanding Shutter Speed and Aperture

Hey there! Pesty Laura here again with some more photography 101.

When I first began playing with my camera I really had no idea what I was doing. I knew the sorts of pictures I wanted but I was afraid of breaking my (expensive!) camera. I mostly shot on auto, which is the little green square where the camera basically decides what look you are going for and does it for you. My pictures were ok. Then I took a photography course and in the course of a few months, my photography skills grew in more ways then just knowing my camera, I began to pay attention to things like light, movement and depth.

Shutter speed in a nut shell.

The shutter of your camera is the little device that opens and shuts to let light in, capture the moment and save it to your disk. Its the little 'whoosh' you hear when you press the button. The shutter speed is how fast or slow the shutter is moving. The faster the shutter is moving, the faster its 'capturing' the action and will basically freeze a few milliseconds in time. The slower it is, the more blur you get because its capturing more time and movement. So if you take a picture of someone running with a slow shutter speed, you will get a blur where their legs are moving.

Why do I want a fast shutter speed? You should never allow your shutter speed to go below 1/125. Your body is going to naturally move as you snap a photo and anything under that is EXTREMELY hard to hand hold (meaning you're not using a tri pod) and you will get some blur. An older child or adult that knows they are getting their picture taken and is sitting there smiling can handle 1/125 but a moving baby or toddler that you are chasing around, you really need to be at 1/200 to make sure the blur isn't going to ruin your photos.

Why do I want a slow shutter speed? Sometimes adding a little bit of motion is neat! A twirling skirt, a spinning wheel can all add interest when you slow time down and capture a little movement. Another very neat effect is to mount your camera on a tripod (or even set it on something like a brick wall), have your subject stand PERFECTLY still and photograph at a slow shutter speed with traffic behind them. Your subject will look nice and in focus, with a blur of motion behind them.

Here are a few examples of neat effects with a slow shutter speed:


A hint of motion in her hair and skirt, enough to know she was twirling around.


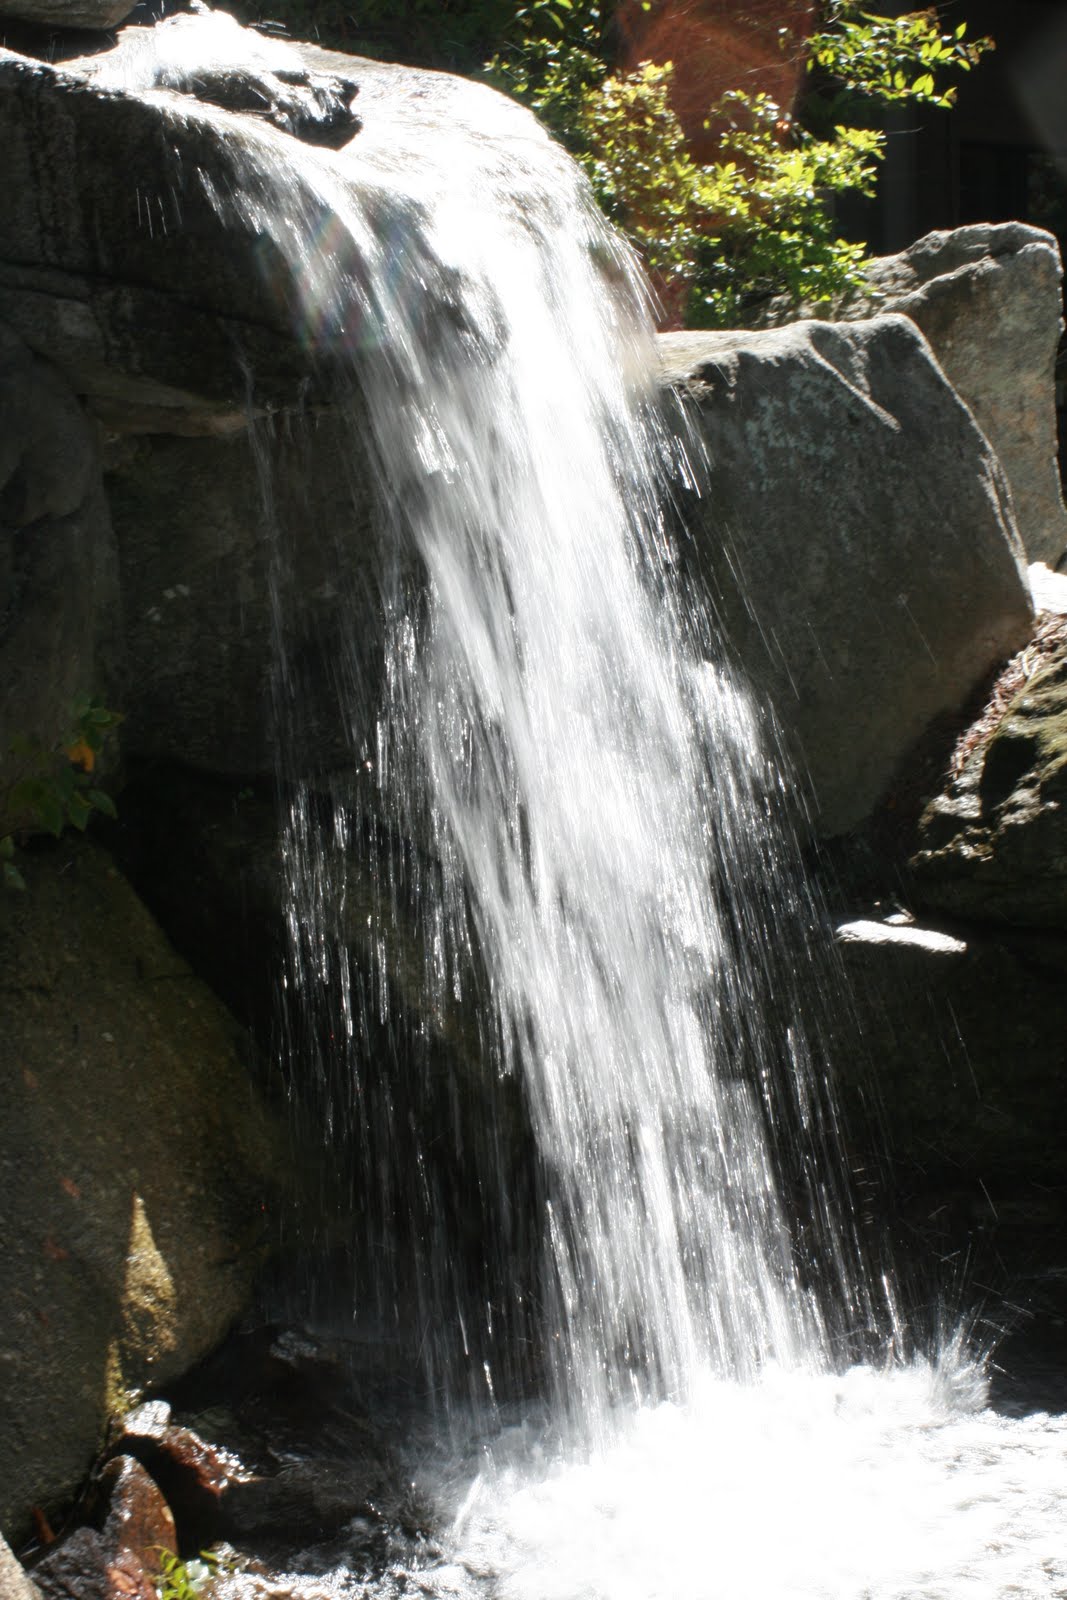
Water is an awesome thing to photograph with a slow shutter speed.

Shutter speed has effected a lot of my photos in a not so great way. Most of the time, if my photo isn't in focus it isn't that I misfocused its because the shutter speed wasn't fast enough and I caught some blur either from them moving or from camera shake (me pressing the button). If you are seeing blur, check your shutter speed and make sure you are at 1/125 or better. If you are shooting in low light, your camera will need a slower shutter speed in order to get the amount of light needed. Changing your ISO or aperture will allow your shutter speed to get up to where it needs to be in order to capture a crisp, beautiful portrait.

Aperture in a nutshell.

I'm sure there is some fancy, scientific stuff to be said of aperture. And there are plenty of camera manuals and books to tell you all about it. I was never interested in the scientific, I just wanted to know the low down. So here it is. A smaller number is considered a larger aperture because more of your aperture is open to allow light to enter your camera. Most cameras start at 3.5 but some, such as a 50mm can go down to 2.8 or lower. Your aperture range depends on your lens and if your lens can't go down below 3.5, you have to look at other ways to get light into your camera.

A 3.5-4.0 is a normal range for portrait shooting. You are getting enough blur to have a nice portrait. The lower your aperture, the harder it is to really pin point your focus. You have a smaller depth of field that is in focus so it can take practice.

Why would I want a shallow depth of field? When we are talking about shallow depth of field, we are talking about using a large aperture (small number), that has our subject in focus and everything else blurry. This is a traditional portrait. Here is an example.


This is a photo of my daughter at 4 months. You can see her face up to about her front shoulder is in focus. At her chest, you start to go blurry and by the time you are to her diaper and leggings, its a complete blur. This was taken at a 2.8. So you are talking about maybe 6 inches being your depth of field (or range that is in focus). That means if I had accidentally focused on her chest, I probably would have gotten her eyes to look very nice. And the eyes are what you are typically worried about.


Forgive the poor quality of this photo. I took this last November so I've had a year of practice since then. This is a photo of my husband and I can tell, it had a smaller aperture because more of the photo is in focus. Its in focus from my husband to the brown part of the trellis. You can see how six inches can go to several feet. A smaller aperture is going to let in more light, but get more of a photo in focus for you.

Small number = large aperture
A small number will allow in more light, meaning you require less light. So in low light situations, you are going to want a large aperture. However because of your shallow depth of field, your ability to focus correctly on the eyes is crucial.

large number = small aperture.
This aperture requires more light. Most likely you will need to be outside or using some sort of flash. You are going to get a larger depth of field, but for portrait photography, you won't want to go above 5.6 or you will lose the blur that makes your subject pop out.

You can see that light will make you choose between a fast/slow shutter speed and a small/large aperture in order to meter in the middle. Somehow your camera has to get the amount of light it needs to capture the image. As you speed up your shutter speed, your camera needs light so you then have to go to a larger aperture, making it harder to focus correctly. Opening up your aperture will require a slower shutter speed, which can cause blurring of your image. Luckily you probably won't run into these problems unless you are shooting indoors or when it is very overcast or when its just getting too dark to shoot outdoors.

I hope this helped you out a little in understanding shutter speed and aperture. Keep snapping the moments!

Tuesday, October 12, 2010

Taking the plunge to... *gulp* manual

Hey there, its Laura here with another photo tip for you today! I posted this a year ago on my own blog and got a huge response so I thought I would share with you also. Last year at this time I was taking my first photography course and learned how to shoot in manual.

To start off, I will tell you that I shoot Canon and more specifically, a rebel xti. If you have a Nikon or a different version of a Canon, some of these directions will need to be modified, but the basics are the same you will just have to locate the options on your own camera.

Step 1.

The first step to shooting in manual is to find the dial on your camera where you change what mode you are on. For Canon shooters, Manual is represented by a capital M. So first step, change that dial to M.

Step 2. Adjusting the shutter speed.

The next step involves adjusting the shutter speed. The shutter speed is how fast your camera captures the action. Your rule of thumb is to NEVER go slower than 1/125 unless you are using a tripod. Less then that, you will get camera shake just from the natural motion your arm makes as you press the button to shoot.

For my specific camera, there is a little dial that rotates right in front of the button you press to take the picture. Rotate it until your camera is set at a 1/125 shutter speed.

Step 3. Adjusting your aperture (also known as your F stop.)

Your aperture involves how much of your frame is in focus. Classic portraits with the blurred background will have a larger aperture. The smaller the number, the small the focus area. This means the smaller your number, the more of your background will be blurred. Regardless, for now we are just going to adjust this to make the camera happy.

Ok at this point, your camera is set to M, your shutter speed is set to 1/125. Now within your camera screen you will see a little number line with 0 in the middle, it goes up to +2 and then down to -2. This is metering. Metering has to do with how light or dark your photos show up. For now we want to 'Meter in the Middle' so that the little black box that shows you where on the number line you are, is on 0.

So now you are going to adjust your aperture until you are metered in the middle. For my camera, I press the button right by the view finder that is labeled AV +/- and use the same dial that I used to adjust the shutter speed.

And now you are ready to shoot! You will notice that as you move your camera around, you will lose your meter in the middle. You will ONLY adjust your aperture to regain the meter in the middle.

What to do if your photos are too dark or light- make sure you are metered in the middle! Your metering will determine how dark or light your photo is. If you are metered in the middle but still do not like the outcome, meter one stop (or to the +1) for a lighter photo, down a stop (to the -1) for a darker one.

For those of you who are scared to go to manual, it really isn't all that scary once you know how to set yourself up for it!

Come back next week for a more in depth look at shutter speed and aperture!

Tuesday, September 21, 2010

Shining Some Light on Light!

Hey there! Pest Laura here with another photo tip for you!

One of the most important elements for photos (besides the adorable subjects) is your lighting! It can make or break a photo. Often something that 'looks' cute in person seems just a bit off once you see it on your screen or in print. Here are a few light pointers to help you capture the moments at their best!

1. The best time to photograph your children is at daybreak or at dusk. This is when the light is the softest and you get a more even distribution of light across the face. The absolute best time is dusk. You have 2 hours from sunrise and 2 hours before sun set to capture the best light of the day.


I took both of these shots for clients at dusk. Here is what happens if you can't catch the best light of the day.


This is just a mommy shot of my son and husband last year at the pumpkin patch. You can see the streams of light make this picture seem almost harsh and its hard to capture catch lights sometimes without your subject being blinded by the strong sun light.

2. When you can't use the best time of day, use a tree! The way to 'fake' the best even light is to use shade. You can position your children's activities under shady trees to get rid of sun streaks and capture a softer more appealing light.


Beware of positioning children ON trees. Not only do you risk the danger of falling but the sunshine peeking through the leaves can leave these harsh sun spots on random parts of their faces as seen in this photo.

3. I don't have a tree either! If you can't take photos in the best part of the day and you have no natural shading from a tree or a building, you can bring your own shade. I often use my reflector as a shadow but a blanket held up to cast a shadow or even for very small children, an adult standing over them. As long as the shadow is even across the entire photo, you have it made!


This was a senior photo I took while her friend held a reflector up to cast a shadow for me.

I hope you are taking advantage of the great sunsets that autumn has to offer! Keep snapping those memories!

Tuesday, August 17, 2010

Color And Photography

Pesty Ashley here with a small photo editing tip:

Colors are what add life and dept to your photographs. Colors can be very difficult to work with when editing your photos. This can be annoying, but the fix is so easy that you will be wondering why you didn't think of it! The Color Wheel will help you with the color challenges you are facing.

For red issues you can add Cyan and find a happy medium.
Too much Blue? Add yellow.
A little too much green?, add a little megenta.
Also, you can flip flop them and get different results.

Happy Editing=)

Tuesday, July 27, 2010

Photography Tip: The Rule Of Thirds

Hi Y'all! Pestie Ashley here with your photography tip!


The Rule OF Thirds:

This was the first basic thing I learned in my photography class.  The rule of thirds is fairly simple for most people. It essentially balances your photos and makes them much nicer to look at. The main goal is to actually achieve the rule on camera, but if you dont get it on camera dont fret. You can always crop to the rule of thirds! Photoshop and Elements have a grid you can use. This rule is very hard for me personally because I am  a  fairly symmetrical person. =) the goal of the rule is to lead whoever is looking at your photo right in to it.
Here is an example of the Rule of Thirds

The area where the circles are is where the main focus of your subject should be.
And here  is an actual shot using the rule.
Happy shooting everyone!
A-

Tuesday, July 20, 2010

Poto Tutorial: Selective Color

Hi!! Ashley here...
Today I am going to show you how to use selective coloring in your photos. Many photographers feel this effect is "Out of Style" or a Cop Out", but in reality this is one of the most sought after photo effects. Most mothers love this type of photo, (I know when I took my kids to Sears I ALWAYS bought the selective color photos.)and I personally like this effect myself. I use it a lot with client photos as well as my own family photos. So today I am going to show you how I like to do selective coloring using an action from the Coffee Shop Blog. If you have never been to Rita's blog you are truly missing out. She is amazing!! First, start with an image that you would like in black and white. then find something in the photo that you would like to leave in color. In this particular photo of my son I want his shirt to stay in color, and the rest in B&W.

The first thing I do to any photo in PSE is adjust the levels. I adjust them to taste, and every photo is different so my numbers always change.

I love this action!! it is one of my many  favorites form Rita. She has wonderfull stuff on her blog so feel free to go and check her out!

Now that your photo is in B&W you need to color what you want to color. In this case Parker's shirt. find the B&W layer(It should be the bottom layer) And click the white box to the side of the photo. MAKE SURE you click this box or you will brush black all over your photo.


Now that the layer mask is selected, it is time to choose your brush. I always use a soft air brush, but it is personal preference. You can adjust the size of you brush using the bracket keys. 
Use the brush to brush what you would like colored. when you are finished brushing you can adjust the opacity of the layer to create a "faded look" if you like.
Now flatten and save your photo. This action also allows you to adjust the contrast and add a vignette if you like. If you would rather not have the vignette then just turn the layer off.


Here is what my finished photo looks like.

I hope you have enjoyed my tutorial, and I look forward to sharing many more. If there is something specific you would like to see please feel free to comment!!!

Tuesday, July 13, 2010

Photographing Toddlers

Hey there! Laura here with another photography tip! This time we're going to talk about photographing toddlers. When your child starts to be able to decide when they want to move, photographing them suddenly becomes a lot more difficult. Not only do you have to keep them still but you have to get them to look at the camera and hopefully smile. I have a few tricks to make pictures with one year olds and up a little easier!

Tip 1. Use a chair!
There's a reason why so my photographers have a gaggle of chairs and its called toddler entrapment! Hopefully you'll have an older sibling or daddy nearby just in case but my son has been photographed in a chair a lot and has never (knock on wood) fallen off yet. They can sit, stand, kneel, chew on and hug that chair and you can capture a lot of adorable shots. Here are a few examples of 'in the chair' pictures.


2. Make some noise!
I have a collection of rattles, bells, whistles and other noise makers up in my studio. One isn't enough. After the child has heard it a few times, they quickly lose interest. Use it until you aren't catching their eye and then grab another. If you are lucky enough to have a set of child hand bells or other instruments, you should be set.

3. Wear something on your head!
Children can't resist hats or ears on your head. They will undoubtedly want it because you have. I often put it on the child first, let them take it off and then put it on my head. While they are busy coming up with a plan to get them back, I snap away. You can often find ears, insect antennae or other funny headgear during the holiday season in the dollar bins at Target or your local dollar store. Children are adorable wearing their head decor as well of course.

I hope these three tips help to slow your child down so you can capture them at their best!

LinkWithin

Related Posts Plugin for WordPress, Blogger...